Friday, December 31, 2010

2010 DIY Highlights & Recap

Follow my blog with bloglovin
There's a lot of reminiscing going on at parties all over blogland!  Welcome to the 2nd annual DIY Recap at the DIY Show Off!  Share your post with your favorite DIY projects this year!  It's so easy to look at what's NOT done, so let's celebrate your accomplishments. I bet your surprised at how productive you've been.  :)


Here are my favorite DIY related projects this year (click the link for the original post and all of the details)...


Thrifty Finds - can't wait for flea market season to start again!

We had a productive and awesome 2010.  Thank you to True Value for choosing us to be on the DIY Blog Squad!
Click below to see our participation with...
I'm honored to have become a new member of the DIY Club and be able to work beside some awesome creative ladies!  If you're not familiar with it - click the link to see all of the fun parties and prizes!
DIY Club

We had a fun experience working with the DIY Club & Gorilla Glue at the Country Living Fair!

Our recent Dremel feature felt like a moment of fame.  

And most importantly... I loved another year of making new blog friends, getting to know each of you more and sharing in the show-off celebration of your DIY accomplishments!  Thank you for your support, reassurance, encouragement and friendship.  Thank you for linking your projects and submitting your inspiration!

Thank you for your comfort and words of hope during the last year of our little doxie's life.

YOU are amazing and I'm so humbled and honored that you enjoy our little space on the world wide web.  Thank you for understanding that I'm just 1 person with a regular job and that even though I don't always get over to see you - bringing something to my attention gets me there fast!  You're each always so patient and kind despite my crazy blog.  :)

Wishing you a Happy, Healthy, Productive New Year!  I look forward to seeing your DIY ideas, projects, creativity and inspiration in 2011!


Showing off your 2010 DIY highlights?  Share here, share everywhere! SHOW OFF YOUR YEAR!

 Its So Very Cheri

Best of Tickled Pink at 504 Main


DIY Club


Join the fun at Be Different Act Normal!
In loving memory of Niski, I've included her in the DIY Show Off 2010 Recap button.  She was a big part of the DIY Show Off since the beginning. 

The DIY Show Off


If you'd like to link YOUR DIY project post to The DIY Show Off Project Parade:

1.You must use the button above and link to this post to share the linky love.

2.Include your name or blog name and project title. Add your permalink (not your blog url, but your DIY project post url). Feel free to link a Past Post, just invite your readers in a current post with a quick note.

3.Or email your link to thediyshowoff@gmail.com and I will add it for you.

4.If you notice your link has disappeared -please add the link back to The DIY Show Off to your post today, a button or a quick note to your readers about the party and try again! I love when everyone participates and readers check out everyone's links, but I think the return favor of linking back is the nice thing to do so everyone plays fair and enjoys all of the projects and links. Also - this blog party is for DIY projects only. Links not related to DIY will be deleted.

5.  Visit the person before you, leave a comment - make a new friend!

A Few of My Favorite Tutorials..

Like most everyone, I'm a fan of the Lettered Cottage and I can't resist joining her 2010 Favorite Tutorials party with just 3 of my own.  I'm looking forward to reading the tutorials linked up too!  What a wonderful weekend past time while Mr. DIY works this weekend.  End of year. Self employed.  I guess there's no preventing it.

Here are my top 3...


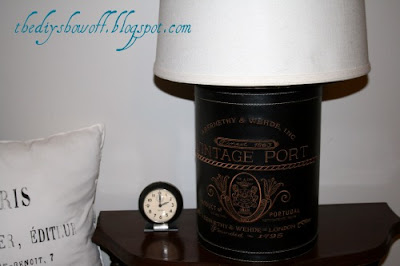
Wastepaper Basket to Lamp - so easy to do!

Hardware cloth Hurricanes (wire candle cozies!)


Okay...so you caught me.  That's 5 but have I mentioned how indecisive I can be?  

What about you?  Head over and link up to...

I'm hoping to highlight my 12 favorite DIY show off features next week...lots to go through thanks to your creativity!  

Thursday, December 30, 2010

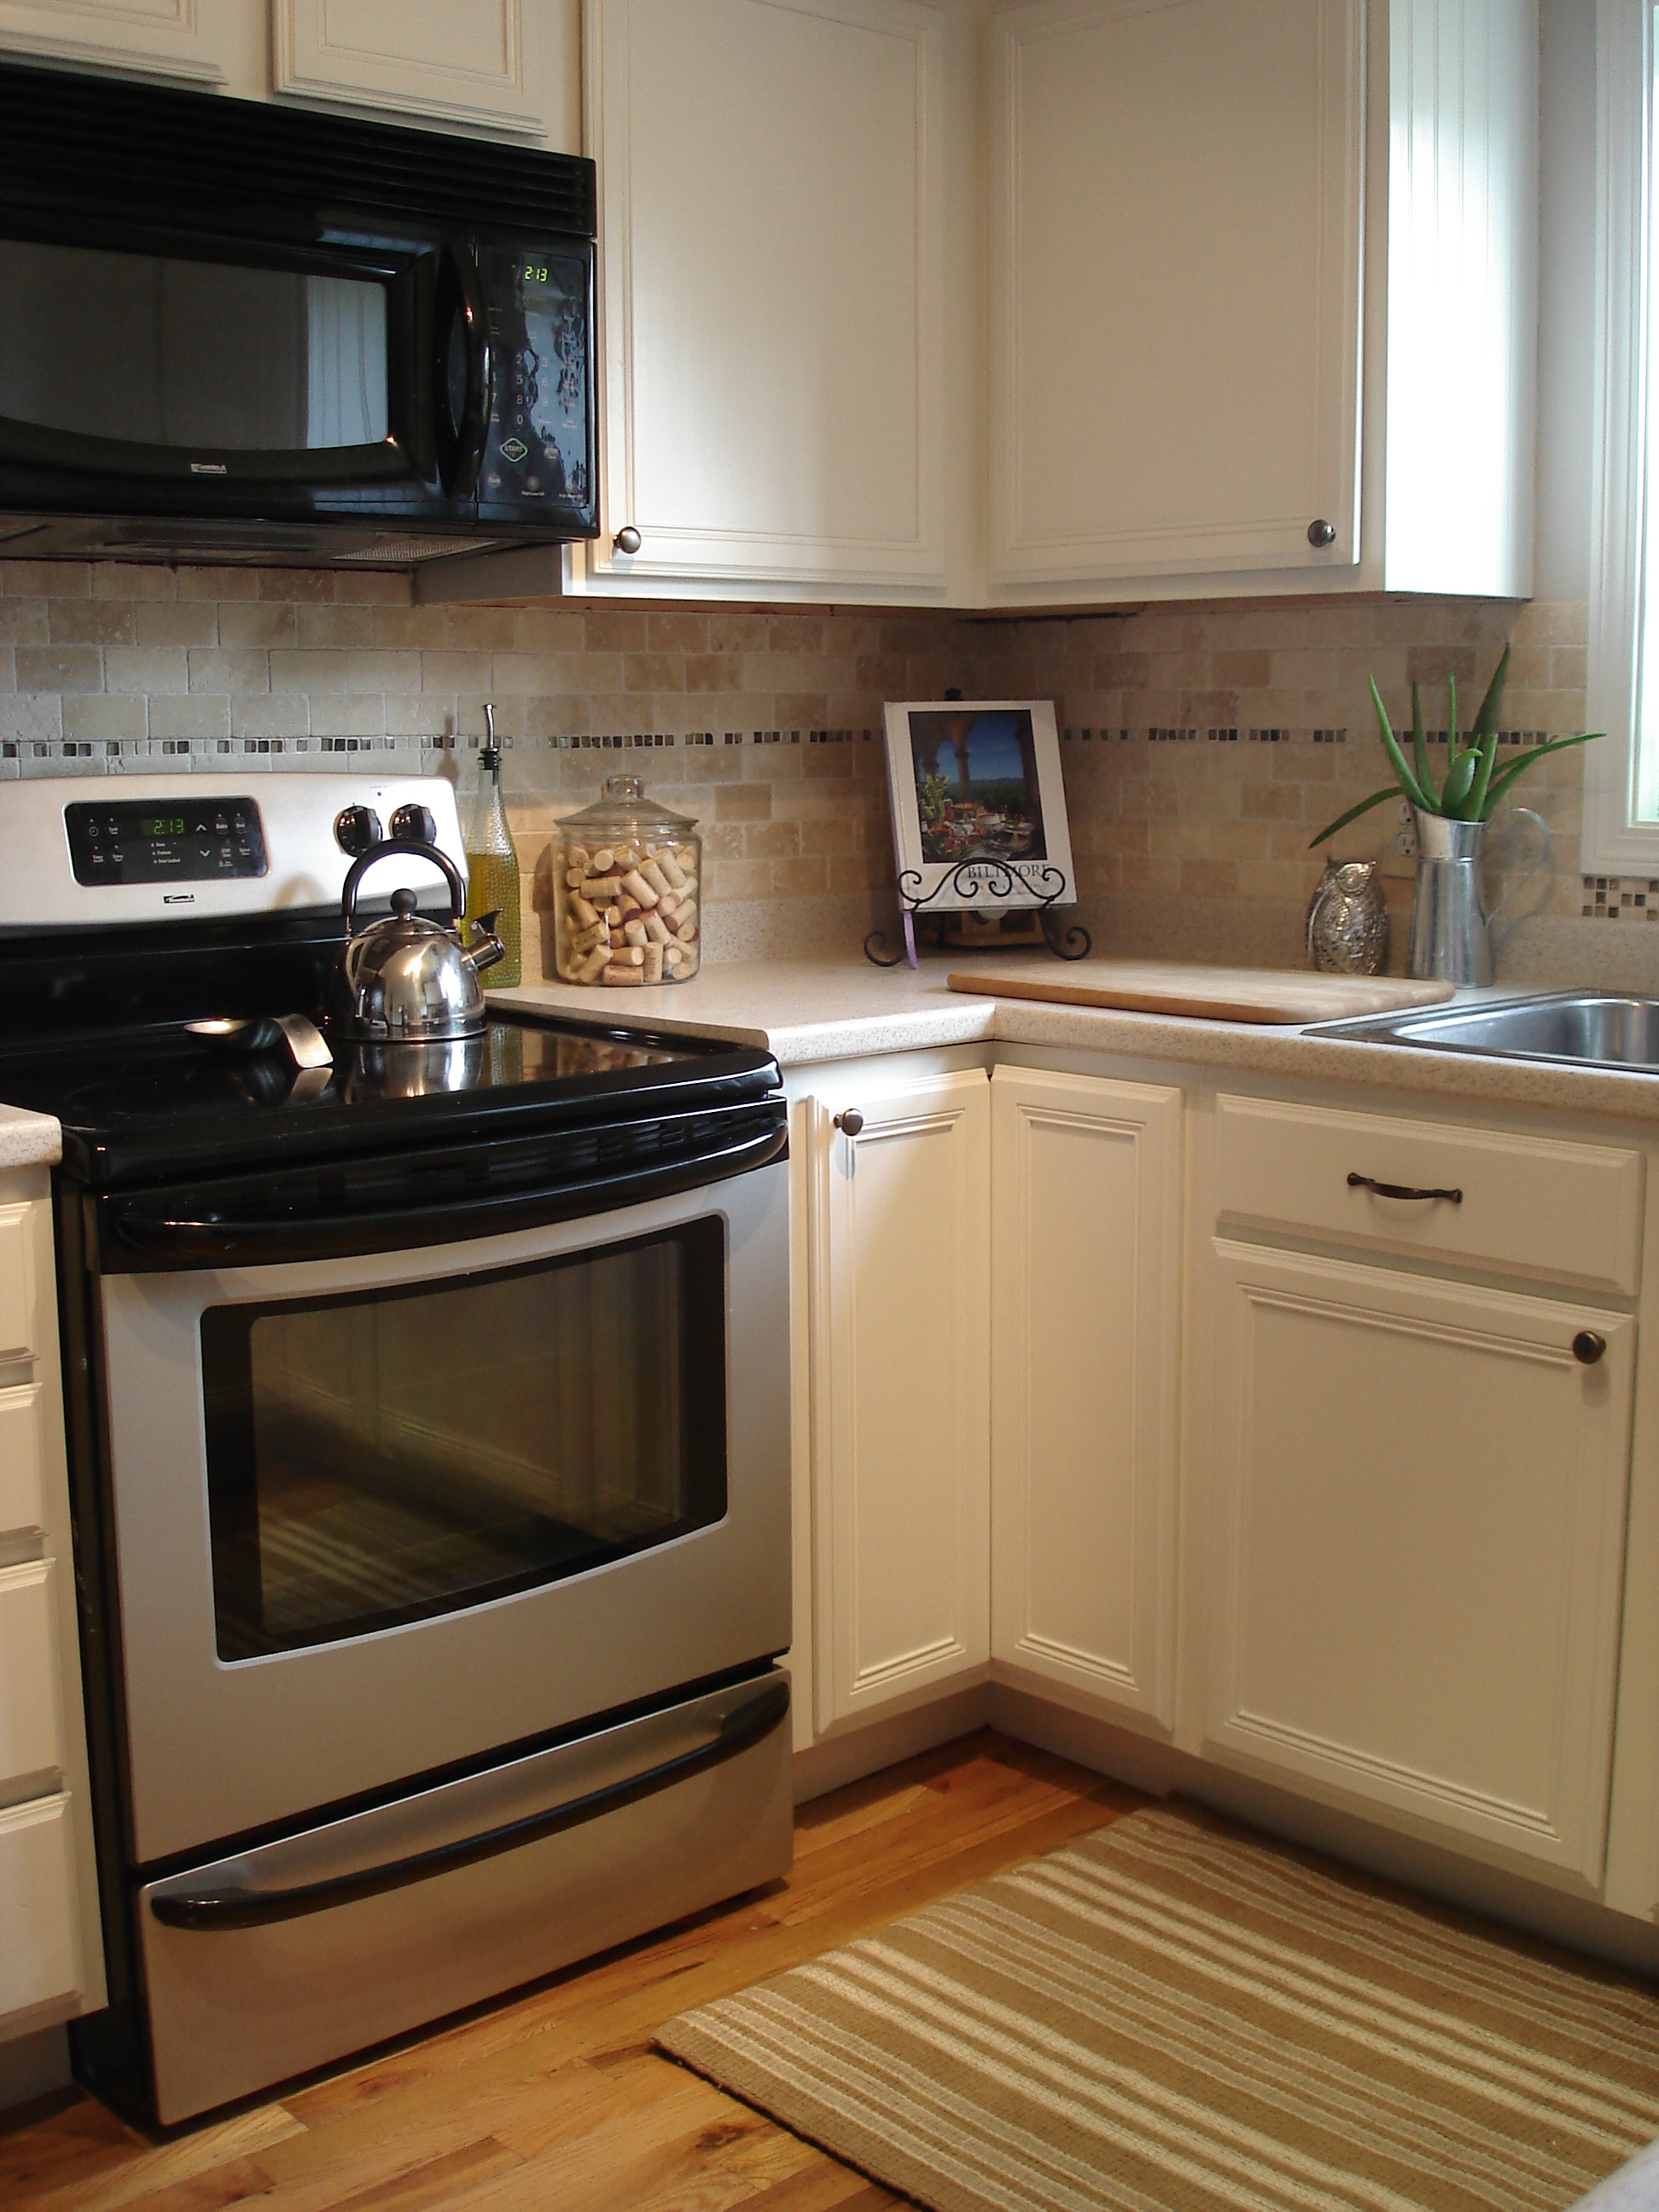
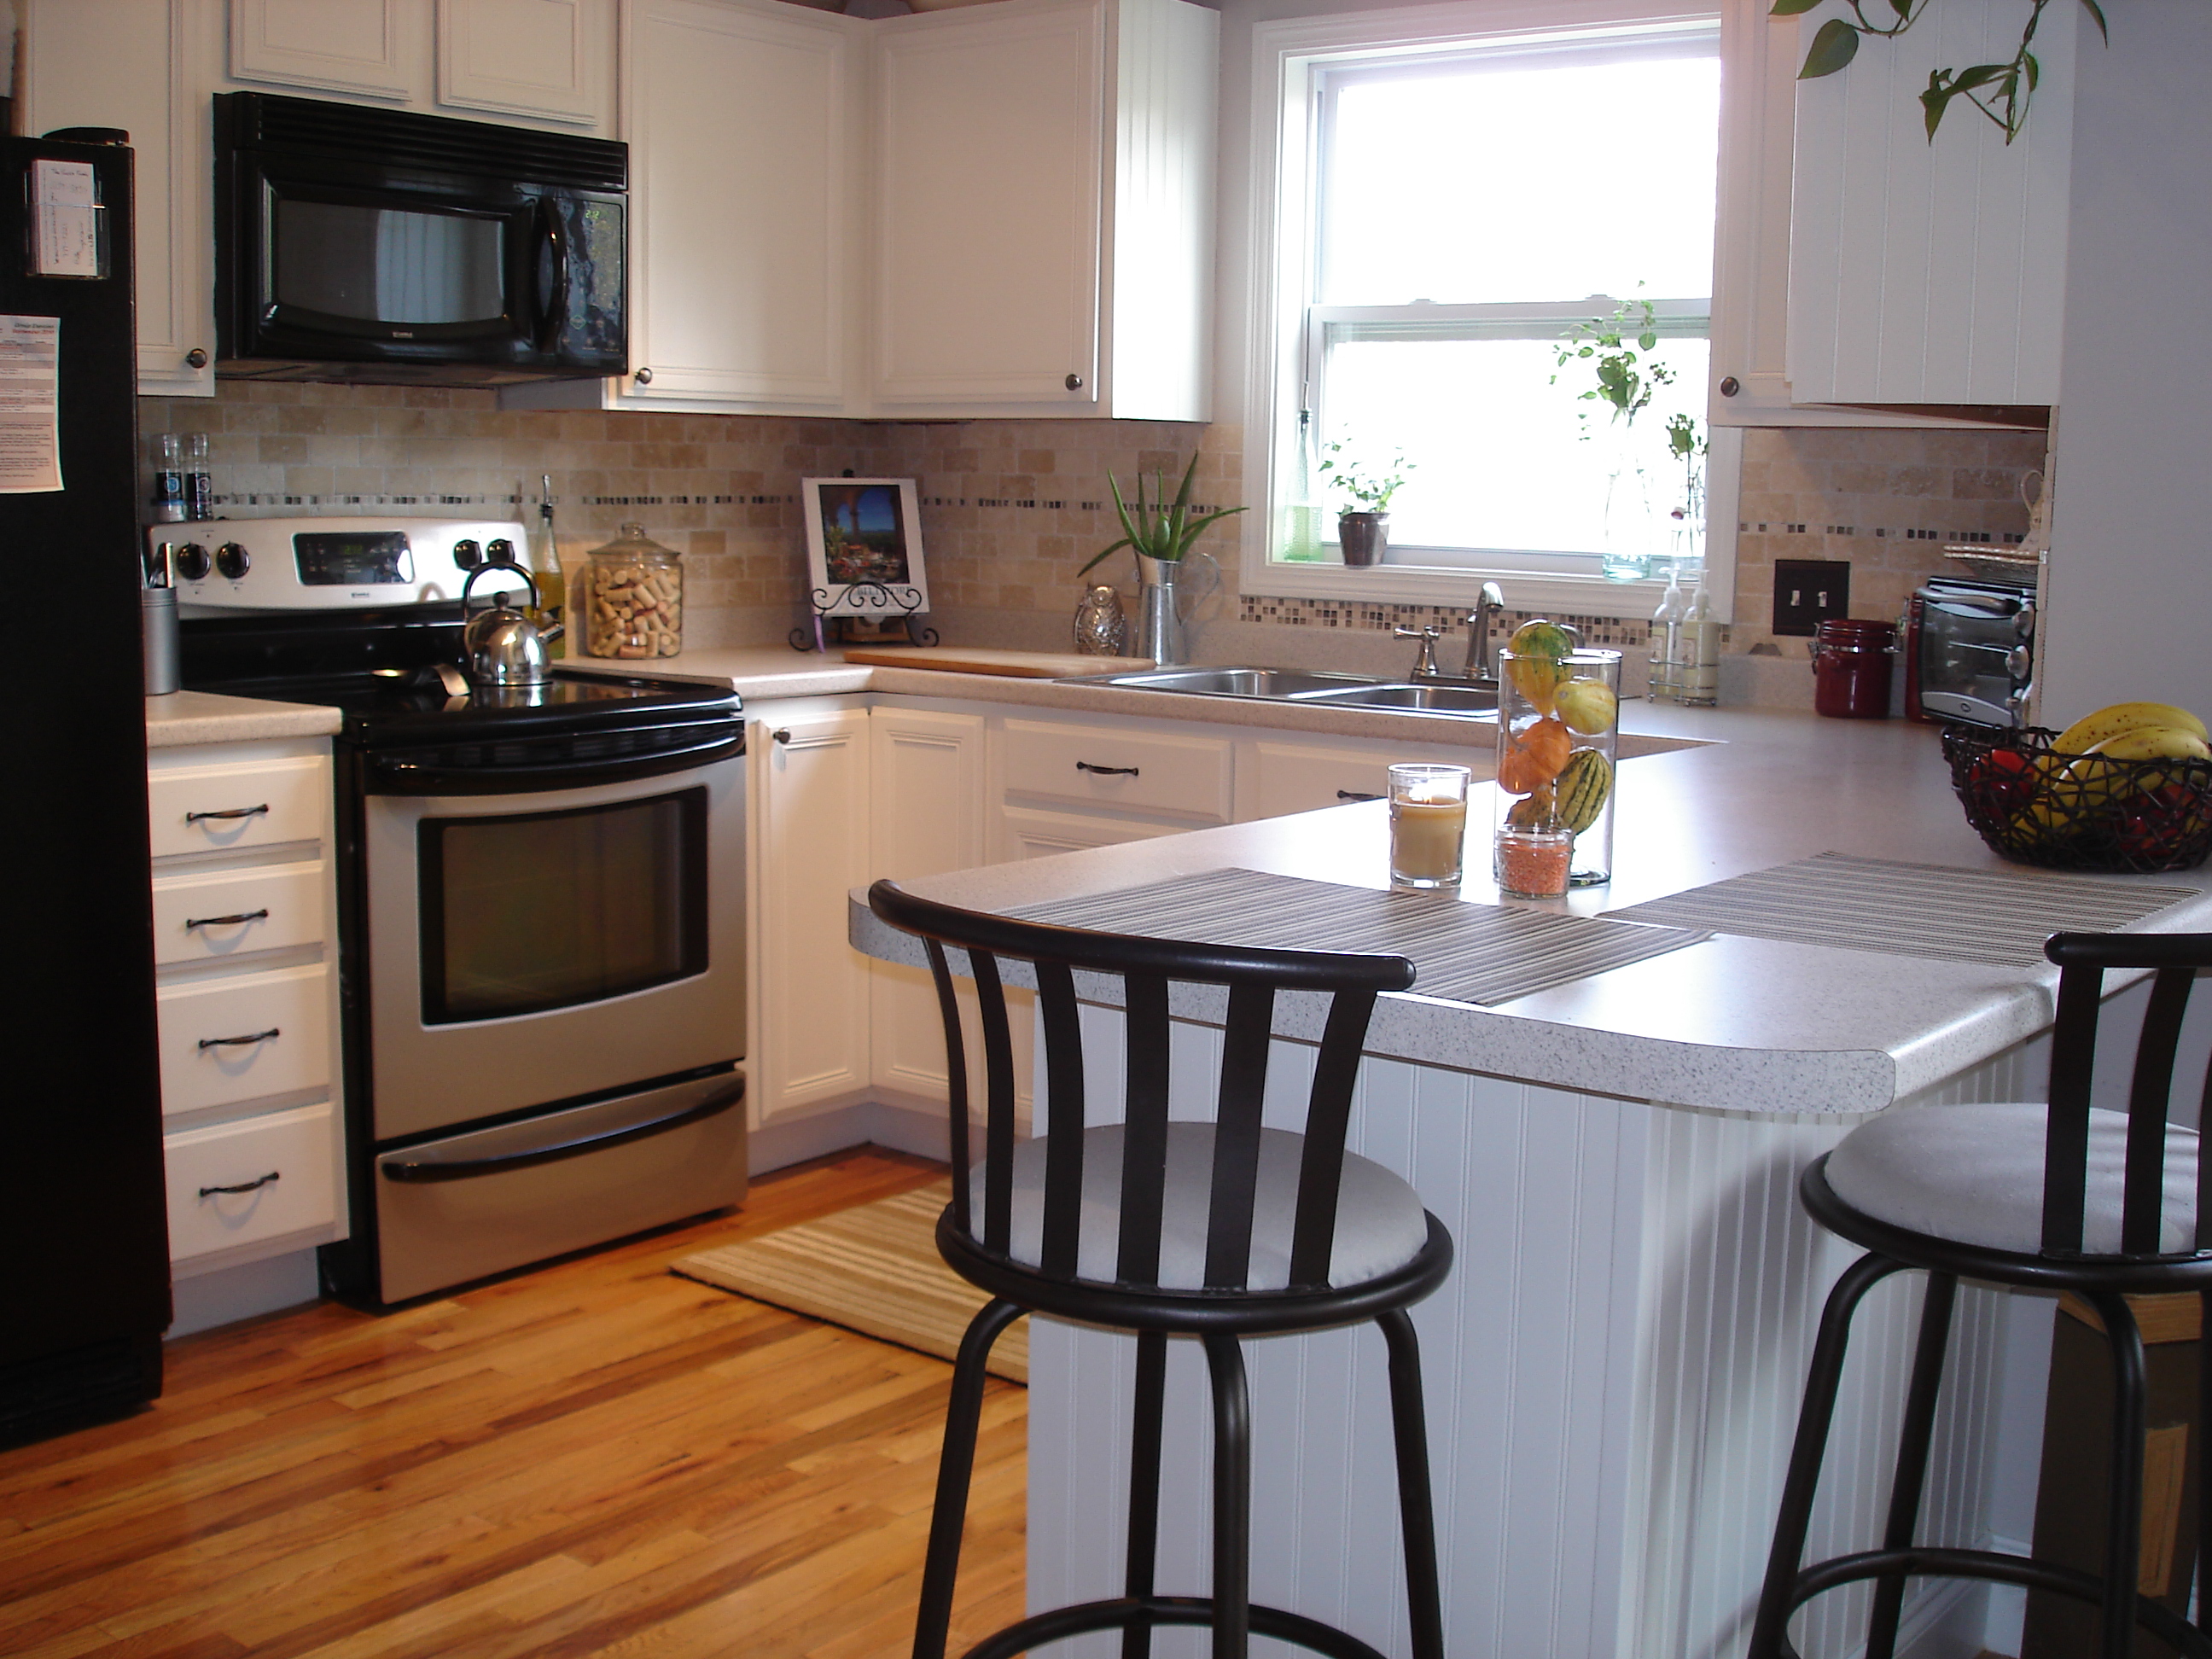
Kitchen Makeover at Lovely Crafty Home

Kitchens. The hardest, most time consuming and expensive DIY but so worth it. I know about the hard and time consuming part!  We're mid-kitchen renovation.  I'm loving this transformation from Rachael at Lovely Crafty Home...such an inspiration.  Thanks for the motivation to get back to work in our own kitchen, Rachael!

Here is her kitchen before:


She has an awesome tile tutorial with LOTS of helpful tips!


My hero! She painted her cabinets and has a fabulous cabinet painting tutorial!  Here are her cabinets before...


Beautiful creamy cabinets after:

Again, kitchen before ...

Kitchen now...

Beautiful!  Brighter, bigger-looking.  What a beautiful job and all DIY!  Awesome job, Rachael and great tutorials!  Thank you so much for sharing your hard work! 

See more of Rachael's creative DIY at  Lovely Crafty Home

Awesome Giveaway Alert!

How would you like a chance to win this?


Don't believe me?  Enter for yourself at ...


(Or don't - because I'd love to win too!  Ottoman obsessed!)

DIY Home Accents

Still on a holiday break?  Here are some ideas if you get the DIY itch over the weekend...(click the blog link to see more details on the original post!):

This Pottery Barn lamp ...
Inspired these first two projects!  They're beautiful!

Pretty rosette lamp shade tutorial at Rosy Red Buttons...perfect in her beautiful nursery!

Or make the Pottery Barn inspired lamp like Charlie from Attempting Aloha.  Pretty silky rosette lamp shade is the perfectly feminine.  

Get creative with your shirt!  Nautical style by Green Issues.

Recycle!  Detergent bottle book ends at Green Issues:

Girl in Air shows how to paint the world!  Or well, at least paint an awesome wall mural!

Take something old but sentimental and make it new again.  Yanet from 3 Sun Kissed Boys gave her childhood wagon a new look!

Before:
After:

Agakry from Niemamconasiebie demonstrates that spray paint cleans up and makes everything look fresh and new.  
Before:
After:

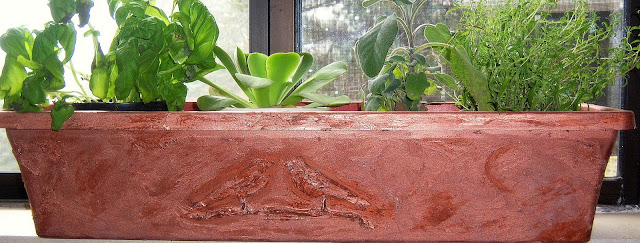
Anne at Bird/Like turned a plain plastic planter...

into this pretty faux copper planter...

I love.love.love Melissa's painted burlap table runner - a must have for my dining room table.  See Melissa's helpful tutorial at Mason Bay

What are your New Year's weekend plans?  


Wednesday, December 29, 2010

Dremel Interview

I'm so excited to learn that our Dremel interview was featured in the Dremel December 2010 eNewslettter!  Thanks for allowing me to 'show off'.  :) 

Check it out at

http://www.dremelnewsroom.com/dremelenewsletters/December2010/index.html#1

Header Image

Hurray!
 We are SO excited!  What about you?  Do you have and use a Dremel too?  Which one?!


Feature Story
A Tale of Two DIYers and the Multi–tool They Can’t Live Without

DIY Multi-Max VideoDo you have an old doorway that’s looking drab or a boring step stool in need of a twist? Not a problem! Serial DIYers and Butler, Pa., residents Roeshel and Russ have proved that for every DIY project or conundrum, there’s a Dremel tool that can help.

From simple home improvements and repairs to giving thrifty finds and outdated furniture a charming makeover, the couple has stopped at nothing to turn their “old, fixer-upper farmhouse” into the home of their dreams. Roeshel estimates that they have completed at least 35 DIY projects in 2010 alone, using theirDremel Multi–Max™ for all of their sanding and cutting needs.

To share her journey and give confidence to other DIY enthusiasts along the way, Roeshel started a blog shortly after buying her home in 2007. Through her involvement with the DIY Club and its blogger community, Roeshel, otherwise known as The DIY Show Off, has featured 120 other bloggers’ DIY projects in addition to her own, and attracted more than 3,000 followers. In fact, Roeshel and her husband feature a total of about 200 outside DIY projects per week!

“We hope our projects inspire and encourage others,” Roeshel says. “Our blog has become a great place to share and find new, creative ideas, and to discover, ‘Hey, I can do that, too!’”

Their latest and most notable project to date, featured in the video above, involved replacing and remodeling an out-of-place doorway to match their house’s existing farmhouse character. Although Roeshel says they were initially apprehensive about how well the project would turn out, their Dremel Multi–Max played a large part in the project’s success.

“It made the job so easy and quick!” She says. “I feel like I have control over my project because of the small size of the tool, but the power and quality is just as amazing as the bigger tools that I’m afraid to work with.”

Other DIY projects where Roeshel and her husband used the Dremel Multi–Max for simple home fixes included transforming Roeshel’s closet, giving their old step stool a new look and designing a chalkboard wall in their kitchen. For more projects and DIY ideas, visit their blog at The DIY Show Off

New Glue New Year Winners!

The winners of the Elmer's Glue giveaway are...


That would be:


#1 Nama Halacy's Comfy Cottage said...


I have a 2 year-old granddaughter who loves to glue. I have learned to save bottle tops etc. so we have stuff for her to glue. So having new glue for 2011 would be awesome for her and for me!

shellyhectic@yahoo.com

Oh, the projects that we'll do. I've got a loooong list for 2011, and one of them includes using glue to create a new mail station near the entryway. I can think of a few other uses, but that's where I'd start!

#3  Leigh said...
I like on FB!


CONGRATULATIONS LADIES!  Please email me your full name and mailing address so I can forward to Elmer's!  Can't wait to see what you're DIY projects will be!


And I found this picture of me and Niski in 2007.  Not sure what to make of her expression.  Fear?  Sorry, girl!   

Feb. 2008...brrrr!

Wastepaper basket to Lamp - Easy DIY

We've had this wastepaper basket for a few years.  It's so pretty but no one sees it sitting in a guest bathroom corner plus the bottom had fallen out.  Time to replace it with something else and re-purpose the pretty can.
True Value sells lamp kits - this one was around $11.  Lamps can be made out of pretty much anything.  We used the wastepaper basket and a plastic charger that I already had (Michael's).


If you're repurposing, clean and disinfect wastepaper basket.  Also - because we used a charger, I have to reach in through the top of the shade to turn on the lamp.  I don't mind because it's what we had on hand and I love the result but you might want to use a smaller plate or if the design on your wastepaper basket allows, just turn it upside down and drill a hole in the bottom. 

Also - this is something you can do yourself.  Mr. DIY took over when I asked about the drill. I was all set to Do-It-Myself but I don't mind.  It's fun to work on things together too!  :)

1.  Mark the center of the charger and drill a hole big enough for a cord.


2.  Drill a hole into the back side of the wastepaper basket big enough for a cord.


3.  Following the instructions, we inserted the lamp nipple through the charger and secured with the adapter on the bottom and lock nut on the top.


4.  Put the check ring on top of the lock nut.


5.  Put the harp on top of the check ring.

6.  Unscrew the set screw a bit from the socket cap and screw the socket cap to the lamp nipple.


7.  Insert the wire end of the cord through the hole in the wastepaper basket.


8.  Pull through the lamp nipple in the charger.

9.  Insert wire end of cord through the socket cap and pull through so there's enough room to work with it.

10.  Attach to socket shell according to package instructions.  Ribbed wire attaches to silver screw.  The other wire attaches to the brass screw (terminal screws).


11.  Insert socket shell into socket cap and tighten set screw.


12.  Add harp top if you took it off during this process.

13.  Glue charger to top of wastepaper basket.

All done!  Add a bulb and shade.

I love how it turned out.  I love that we repurposed it into a lamp.  It's going in the guest bedroom (our next project after the kitchen).


What do you think?


Have you attempted to DIY a lamp?  A lot easier than it sounds, isn't it?


*~*~*~*~*~*~*~*~*~*~*~*~*~*~*~*~*~*~*~
I was one of the bloggers selected by True Value to work on the DIY Squad. I have been compensated for my time commitment to the program as well as my writing about my experience. I have also been compensated for the materials needed for my DIY project. However, my opinions are entirely my own and I have not been paid to publish positive comments.
~*~*~*~*~


I also wanted to say thanks to Mike and Katrina at
for featuring my bathroom!  Hurray!