Wednesday, June 30, 2010

Master Bedroom Makeover

I love room makeovers!  I love seeing a boring space become something beautiful and this makeover is special.  Carla from  A Wannabe Mermaid's Diary of Living Out Loud decorated her sister's master bedroom.  Here is her post:

Because I love her....

For my sister's birthday in March I planned to redo her whole Master Bedroom. Although she had painted 2 walls a chocolate brown she had hit the decorating wall. My mission was to completely redo her room for as cheep cheep as possible.


I do really love you Jules & Steve.


My nieces and my Mom really worked like dogs to complete the whole makeover in 4 hours and 20 minutes FLAT!


Ahhhhh that colour is like tonic...that caramel and chocolate, the room is starting to look like a Caramilk bar.


BEFORE - used donated IKEA special....yukky pine.


....much better hey?


Now the room is starting to take shape!


A corner to curl up in.


It all makes sense.


The whole room in fact came in at just over $40.00 to redo. I gathered decor and pictures from her girlfriends, my closets and those that wished to donate towards the room, my Mom remade over a bed-in-a-bag set she already had. I haunted second hand stores for about a month and got a lamp, shoe organizer, decor items and craft papers at a steal. The only things actually bought for the room were new curtains and some paint. I remade the dresser over from a donation from our I.T. guy at work.


I have to say this was one of my favourite projects to date not only because it turned out so gorgeous but because it truly showed my sister and my BIL how much I love them.


Tears were present at the reveal which only cemented the notion that I already knew.... she loved it!


What a big beautiful difference!  I love the chocolate wall and the romantic lighting!

Great job Carla!  Thanks so much for sharing!

 ~*~*~*~
This post is brought to you by 
Tiger claw fasteners are a leading brand of hidden deck fasteners not only carried by DIYhomecenter, but now by leading retailers.

Tuesday, June 29, 2010

DIY Beachy Wall Art

I loooove beach cottage decor and when I got a or letter from Shannon at Project Shannon, I couldn't wait to share it with you.  It got lost in my inbox, but I just re-discovered it. or you would have seen this sooner (sorry Shannon!).  Here is her tutorial:
 

DIY Art: box frame

A few weeks back I came across a really interesting website, conveniently named, Pale and Interesting.  The website honestly deserves a whole post.  It's full of home decor items, great gift ideas, and really unique things - all {almost} void of color.

But this post is about a frame I saw on P&I, and just
loved.  I thought to myself, "Hey, this would look so great in my living room - perhaps one on either side of the TV?  Adorn that wall with something other than a plasma?"
 Pale and Interesting
But at 80 pounds (yeah, the one drawback, everything is expensive and is located in the UK) - there was
no WAY I would be purchasing two of these babies.  But it looks simple enough.  So I set out to make this, instead.

But the Hubby had the idea that white frames, with a white mat, with white sand dollars, might be a little...well,
white for the wall.  So why didn't we make the mat something more visually interesting?  Instead of buying special frame mats, which might cost a bit more, I could cover an existing mat in something with texture.  We visited a couple craft and specialty paper stores, before the Hubby decided that burlap was the look he wanted.


So I purchased two white Ikea Ribba 9" square box frames, cost: $6.99 each.  I picked up a 1/2 yard of burlap fabric at my local Joann's, cost: $2.99/yard.  I found a website where I could buy "cookie" sand dollars.  I needed 18 sand dollars for the two frames (and I bought a few extra in case some were damaged during shipping - but they arrived in great condition!), cost: $.12 each.  I already had Fabri-Tac on hand, cost: free.  So the cost
per frame totaled: $9.57.  Much better than 80 pounds - plus conversion cost!

First, I disassembled the frame, and cut a piece of burlap to size, with roughly an inch of fabric around all four sides.  Next, I cut an "X" from corner to corner within the center of the frame, so I could wrap the fabric from the inside.

I began wrapping and gluing....starting on the inside....(notice I snipped off the corners so the fabric wouldn't overlap the outside edge of the mat.)
I also made sure to dab a bit of glue in each inside corner, so the burlap wouldn't fray and look unkempt in the frame.

...then working my way to the outside.


Until I had nicely covered picture frame matting.

Then I assembled everything into the frame, but
removed the glass, so I could position the sand dollars, while seeing how it would "look" as a finished product.

I actually used the back of the Ikea paper template, and glued the sand dollars directly to it.  If you wanted to alter the hue of this backdrop, it would be easy to cut a piece of printer paper or card stock to size.  Fabri-Tac worked really well as an adhesive for this project, and I didn't have any concerns about drying, ripple-effect on the paper, or similar.

But it came out great!

They are the perfect size for the wall.  Doesn't my version look just as good as the original?
 

Isn't that beautiful?  And - she did two of them for $20!  What a deal!  Definitely an idea I plan to use for our guest bedroom makeover!  Thanks for sharing your creativity Shannon!  I love it!  And I do like it better than the original - love the texture from the burlap matte!

Check out Shannon's pretty basement dress up project too.

Niski says hi!  Bit of a set back yesterday with a UTI and more meds, but overall...hanging in there!
~*~*~
This post is brought to you by
With deck hidden fasteners you have no more worries about stubbed toes during your 4th of July deck celebration.

Monday, June 28, 2010

FIFA 2010 Home Decoration

 The World Cup is the most widely read sporting event in the world. If your kids love soccer, they are probably as excited as anyone to this spectacular event. You can use the football, soccer and the biggest world event world cup 2010 wall decals, Unfortunately, the World Cup is only every four years. So your children conceived by pasting wall decals prints with the design inspiration for this event. This post show you an example of soccer or football wall decals, and also sample of FIFA world cup 2010 wall decals sticker for your home decoration.

Sunday, June 27, 2010

DIY Project Parade

It's that time of the week! Time to share all things DIY!


How would you like to win $100 towards your next DIY project?  Here are the details! 
CustomMade.com, owns custom made furniture, they wear custom threads, and are all about promoting the custom way of life.  Of course, we have our own angle on why custom is so much better, but we want to hear yours!  Starting now through Monday July 12th, submit your answer to the question “Why Custom?” for your chance to have your words immortalized on the CustomMade.com “Why Custom?” section of our homepage.  Should we pick your entry and you are a CustomMade.com subscriber, we will also link to your profile from your answer on this page.  Entries should be a concise one-sentence long reason why custom made goods are so much better than stuff that comes off an assembly line.  Be funny, be serious, be creative, just make your point clear! Here, check out our old “Why custom?” page here.  These are good, but we know you can do better!  You can submit an entry by clicking the link below and filling out the web form.  Entries will be reviewed Monday  (July 12th) , and the top 10 winners will be announced shortly thereafter.  You may submit as many entries as you’d like. Good luck to everyone!

I haven't had the opportunity to work on my DIY projects this week but see the links below for some awesome DIY ideas and please link up your own DIY project!  
Niski has something to show off today.
Can you see what her little undies say?  How is this DIY?  We did have to cut a hole in them for her tail!


Niski is adapting so well to her new routines.  I on the other hand am taking a bit longer to adapt. Yesterday I ran to the store. As you know, she's on bed rest.  So, I left her in her cart near the back door with a view of the yard.  When I returned, the cart was empty!  I about had a heart attack and freaked out.  Where was she?  Was she dog-napped?  Did she find a way over the high wire walls and fell?  Is she hurt?  My little Houdini weeine, wiggled her way through the wire sides (they're pretty movable) and scooted 3 rooms away into the living room - onto the wool rug that she's allergic to and not allowed on.  No harm done other than so much for strict bed rest that day.  She didn't hurt herself thank goodness! Bad girl!  Now we know to put her in her crate when we leave and  that the cart is only for supervised times.

Thank you so much for your prayers, comments, love and support.  The blogging community = the sweetest friends.  It's been an emotional and exhausting week.  Your comments, hope, reassurance and advice gave us so much comfort.  Thank you from the bottom of our hearts! 

~*~*~*~
So...that's what I've been up to.  What about you?  Feel free to link up!


The DIY Show Off

If you'd like to link YOUR DIY project post to The DIY Show Off Project Parade:
  1. You must use the button above and link to this post to share the linky love.
  2. Include your name or blog name and project title. Add your permalink (not your blog url, but your DIY project post url). Feel free to link a Past Post, just invite your readers in a current post with a quick note.
  3. Or email your link to thediyshowoff@gmail.com and I will add it for you.
  4. If you notice your link has disappeared - pleaseadd the link back to The DIY Show Off to your post today with a quick note to your readers about the party and try again! I love when everyone participates and readers check out everyone's links, but I think the return favor of linking back is the nice thing to do so everyone plays fair and enjoys all of the projects and links. Also - this blog party is for DIY projects only. Links not related to DIY will be deleted.
--- 
This post is brought to you by... 
 

When it rains on your deck now you can you stay dry below it with underdecking?

Saturday, June 26, 2010

Decorating Obsessed - Wall Stenciling & Fireplace Makeover

Ashley at Decorating Obsessed has been busy!  She won a stencil at Cutting Edge Stencils and chose the houndstooth pattern.  She did an amazing job.  I love houndstooth and the colors she chose are my favorites.  AND she gave her fireplace a beautiful makeover too!  Here are her posts:!

THE HOUNDSTOOTH WALL:
The houndstooth wall is done! Thank god.


Was it the most tedious process ever? Yes. Do I love it and find it totally worth it? Definitely.

When I won a stencil from Cutting Edge Stencils thanks to DIY Showoff’s giveaway, I knew right away houndstooth was the only way for me to go. I was nervous that the stencil would be a single houndstooth, so I was thrilled to discover how large the stencil was when I got it in the mail.


My biggest issue with the stencil was there was no way to keep the middle part flat against the wall. The instructions said to paint with a sponge roller –but not only would that get messy but I would not get the crisp lines I was wanting.

So I decided to use the stencil to trace the pattern onto the wall and then tape everything off. Yep, the project I envisioned to take me a day took me 4 weeks.


Some readers wanted to know how I fly through so many audio books last month – paint a houndstooth wall and you’ll figure it out too. ☺

Honestly though, it wasn’t as bad as it sounds, once I figured out a system. I got the majority of the project done over 3 Sundays, so I don’t feel as thou
gh I was slaving away or anything.

Considering the stencil was free, I only spent $18 and that was on painter’s tape. I used leftover paint from my office stripes.
THE FIREPLACE:
 
I'm blogging and drinking wine. You have been warned.

I wanted to spare the length of the previous post, and do all the talky talky in this post.

I never hated my fireplace, but I never liked it. It was this thought right there that made me take the plunge.

Before:

PREP
My fireplace was dirty. There was grout that would just fall off if you looked at it the wrong way. Brick is tricky like that, because it takes more work than running a vacuum over it (although, don't worry, you have to do that too).

1. Use sandpaper. You aren't using sandpaper to rough up the brick, you are using the sandpaper to get all the crap out. During this process, I recommend focusing mainly on the grout regions.

2. Vacuum. Now it's time to vacuum, to get all the loose nasty out.

3. Wipe down. I used several damp paper towels over it, to further clean it.


PAINT
I decided to use the same white paint I have been using everywhere else in my house – Ralph Lauren's Frost in semi-gloss. I wanted to stick with semi-gloss, because the brick would suck up a lot of the shine to it and it would be easier to clean.

The brick on my fireplace is very textured and rough, because of this I didn't use a primer. But if your brick is of a smoother quality I would recommend one.

Once I was done painting, I moved on to caulking bricks that were cracked.

THE SCREEN
Addressing the screen was the scariest part of this project for me. I decided to take my friend Leslie's advice and spray paint everything indoors, like she did on hers.

When picking a spray paint – make sure you are using one that is heat resistant. Sure, it doesn't come in as many fancy colors, but it also doesn't set your house on fire. (Food for thought).

Here's my screen all taped off and ready to go:

Unfortunately, I'm a moron and got the spray paint on my feet and neglected to realize it. And of course I walked around the family room, leaving a nice film of spray paint dust everywhere. So, if you are wanting to spray paint indoors – stay on your plastic tarp.


THE SHELVES
While it's might be hard to tell in this photo, the shelves looked terrible once the fireplace went white. Like everywhere else in the house, the previous homeowners were a fan of beige with a yellow tint. When you pair this with white, the beige transforms into a pastel yellow.

Once the shelves went white, I painted the background a different color for a pop.


After:


Button
Ashley - you're so patient and so talented!  The houndstooth looks amazing! I love the fireplace too!  LOVE the bricks painted white and the new black instead of brass.  It looks perfect with the shelving!  You did a fantastic job - what a big beautiful improvement/focal point!  Thanks for sharing your hard work and DIY talent!  Click her blog button above to see more of her beautiful home!

*~*~*

Niski update - I think we're getting into a routine!  Last night she slept in a crate for the first time ever (well, she slept in a crate at the hospital.  I don't think I told you about the time before blogging that she swallowed a thumb tack, did I?  Surgery and all better.  Scary then but we laugh now and joke that they should have put a zipper where her long scar on her tummy is.)  Anyway - she slept in the crate all night.  I wasn't sure how she'd do since she's used to 24/7 access to her potty so I put a diaper on her just in case.  I woke up this morning and she did just fine.  She even showed a little defiance.  Like "I'd don't pee the bed and I don't need a diaper" - she tore it off.   So, things are going well.  She is back in her cart for the day and currently sitting outside sunning herself. Thank you for your prayers and comments.  You helped keep me sane and have hope the past few days.  

*~*~*
This post is brought to you by
 Tiger claw deck fasteners create a smooth nail free surface that even the DIY type of guy can do on a weekend.
 -----
This post is brought to you by Victorian Fireplaces, beautiful and stylish cast iron, marble and wood fireplaces. 

Friday, June 25, 2010

DIY Easy Wall Art (and Niski update)

First, I want to thank you all SO much!  Your comments, support, love and prayers give us comfort and strength to get through this with Niski.  We've chosen conservative treatment at this time with meds and 8 weeks of bed rest.  I think we've established a routine.  My mom also had a cart (for flea market shopping) which Niski fits into.  She has enough room to lie down and be immobile (bed rest) but can be in the same room with us.  Here she is hanging out with me in the living room today:


She isn't in any pain and still has bladder control and wags her tail. She still has an appetite and has resigned to taking the meds without too much of a fight. So, please keep the prayers coming.  It's going to be a long summer without being able to chase birds and chipmunks but if she's back to herself after that or even paralyzed but able to have a happy pain-free life, then it's worth every minute.
*~*~*
Now to the topic of DIY!  Brooke from Sweet Mint Studios has the cutest DIY wall art project going for a nursery. She is also the sister of Britt, one of the most creative DIY'ers I know!  Here is her post and precious wall art:


Decorating :: Easy Wall Art, Part I

My sister, Britt has been sharing a series titled "Easy Peasy Wall Art" on her blog A Penny Saved. She has some really creative ideas. Take a minute to hop on over there and check them out! This week, she has asked me to guest-blog for her, so I'm sharing some of my own DIY art, and of course I wanted to share it with my readers as well! So, here it is:

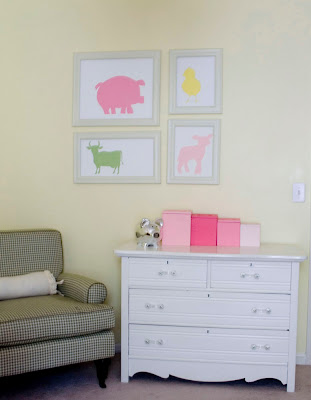
Let's start in our girls' room. When I was 8 months pregnant with Clara, our first child, I waddled into Hobby Lobby and stumbled on an incredible sale. They had marked tons of frames 90% off. If you've ever been in a situation like that, you KNOW that their buggies are way too small! I fit as many frames as I could in my buggy, and then I was faced with a dilemma. Should I walk away from the other frames that I wanted in order to grab another buggy and hope that they would still be there when I got back? No way! I grabbed all of the frames I wanted, and threw them over my shoulder... and then my other shoulder. Then I carefully, precariously made my way to the check-out counter. By the time I got all of my treasures home that day, I was pretty proud of my accomplishment. I showed my hubby all of my deals and he wanted to know what in the world I was going to do with so many frames??? So, I then had a mission to fill them. I've used several, but secretively, I have many, many more hiding under the guest bed! So, without further ado, here is our little girls' room.


With so many frames to fill, my goal was to get creative because art, mats, and glass can add up quickly. Here's how I created the wall art above:
1. I hung the frames and then using light pencil marks, traced the inside dimensions of the frames onto the wall. Then I took down the frames and got to work.
2. Painted the entire outline white. So there were four white rectangles on the wall.
3. I cut a scallop stencil out of a piece of cardboard and used it to trace the scallop outline on top of the white rectangles. Then I filled them with pink paint.
4. I brushed some light green details on the edge of the scallops.
5. My hubby hung the glass knobs for me.
6. We put the frames back up where we had initially hung them, but this time, there was art inside the frames.

There are so many different things you could hang from the glass knobs. In the pictures above, the baby dresses that are hanging are dresses I wore when I was a baby. It's sweetly sentimental. Right now the girls are still little (they just turned two and one). As they get older, I'll take down the baby dresses, and frame something else. It'll be such a quick, easy change that will really allow the frames to grow with my girls!

Click HERE to see Part II of her DIY Wall Art series.  Here is a sneak peek:

Thanks for sharing your creativity Brooke!  Beautiful job!  Sentimental, pretty and easy!  LoVe!

---
This post is brought to you by
With decking fasteners, your new deck will have a durable blemish free surface designed to impress.

Thursday, June 24, 2010

Niski Update

I can't bring myself to blog about DIY today.  I hope you can understand.  Thank you so much for all of your thoughts, prayers, advice and love and support!  It means the world to me and is so reassuring!  

Niski's condition declined overnight.  As hard as it is, I kept her confined to a small area with just her bed and her newspaper.  She is paper trained.  This morning I peeked in on her and she had made her way to the paper but something didn't look quite right.  Her back legs are paralyzed.  So I used a scarf as a sling to lift her back end, but she is used to potty "privacy" and of course she was just excited to see me so she wouldn't go.  I put her back in her bed and went to make a cup of tea.  I came back to a mess. Poor thing. I just got her cleaned up.  I had hoped the meds would have made her improve but maybe it takes a day or two. ?  

This is her this morning.  She seems like herself.  It's heartbreaking. She's panting because she was excited - thinking I was going to pick her up and let her out.  :(


I will be calling the vet here shortly when they open.  I appreciate your continued prayers and hope to have good news to report soon.  

I know you understand that blogging about DIY is the last thing on my mind  right now and hope you don't mind me talking about my Niski.  If you'd like to be a guest blogger and show off your house tour, etc. just send me an email including the "html code" from your post and I will share it.  I am on the computer.  I work from home and I'm researching every possible option.  Thanks again for your compassion, understanding, reassuring words, thoughts and prayers!  Your comments bring me so much comfort. 

Wednesday, June 23, 2010

We interrupt this DIY for a Prayer Request.

I know this isn't DIY related but we're friends and I believe in the power of prayer.  If you do too, please say a prayer for our doxie, Niski.  

No specific injury but from what I've heard, it's common in dachshunds.  Last night we noticed she didn't seem comfortable and was panting and acting a little differently.  This morning she was walking funny and it looked like her back legs were dragging.  There aren't too many things worse than seeing a pet in pain.  I took her to the vet a.s.a.p.  It's her back.  We opted for trying meds first.  They didn't do x-rays at this point because treatment is the same with/without them and they could diagnose by her symptoms that it's likely a disc problem.  They put her on muscle relaxers and steroids.  If she doesn't improve or gets worse in two days, we have to make a decision.  She will need surgery that isn't 100% guaranteed to work.  Although there is never a good time, the timing is the worst for us financially.  My heart is breaking. 

Please say a prayer that the meds work and she is running circles around us again in a couple of days.  She is a sweetheart.  Always happy.  It breaks my heart to see her in pain. She's 5 years old.  She's a mini and a dapple.  She is probably borderline overweight but only eats once a day.  No people food.  She does jump on the occasion that she beats us to the couch but we usually have her blocked from it because of her allergy to the wool rug.  She's been trained to stay away from the stairs so she doesn't go up and down those and again, she's blocked from that room when we aren't around.  Anyone have a similar experience?  Any advice?  

We appreciate your prayers more than ever.  

If you've been a follower for a while, you might remember her being guest blogger (here).

Thank you!