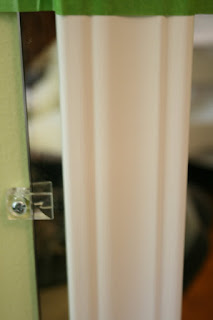
The mirror in my daughter's room is in a great spot (between 2 closets) but it's so boring! It has tiny plastic holders and it sits low/close to the duct work/register. So...I decided to frame it inside the plastic holders and dress it up. A frameless dressing mirror in a princess room just looks out of place. Now it looks like this:
I love the little message. Who can't use a little boost in self esteem once in a while? I may even have to get dressed in there. Here's how I did it.
Using a dry erase marker, I measured and drew a line where I wanted the decorative trim to be placed. I measured that area so I knew where to make the miter cuts.
Then I psyched myself up to use the miter saw which is up there on my list of fears. Right beside spiders and sitting in traffic on a bridge. That scared! But I DID IT! And it wasn't nearly as bad as I thought. Truthfully, I made Mr. DIY do the cuts so I could watch and get brave again. Then, I noticed that the frame was too big. I sort of didn't want to tell Mr. DIY and I was ready to be a big girl, so I re-measured and stood up to the big mighty miter saw.
Here I am in my cool pink safety glasses...safety first!
Next, I painted the four pieces of trim. Since I'm applying the trim directly to the mirror, I painted near the edge on the back as well (so it would reflect white when glued to the mirror itself).
I love this pretty white from Mythic. It's the same interior semi-gloss that I used on the trim in my daughter's room. It's Mythic Sweet Silence. I didn't see a disclaimer that it'd bring "sweet silence" from your teenager's room but it is non-toxic and low VOC.
Once it was dry, I applied the White Gorilla Glue to the mitered edges to form a frame. I don't have clamps for this purpose so I taped the edges and used paint cans to weight the glued areas. I did this on an unfinished concrete floor so if there were a few places where I used too much glue, I was able to pry it up. I let it dry for a few hours.
Next, I took the frame upstairs and flipped it so the back side was facing up. I added White Gorilla Glue to the back of the entire frame.
With my daughter's help, we placed the frame onto the mirror (I did erase the dry erase marker lines before this). We held the frame tight against the mirror and taped it to hold until the Gorilla Glue dried.
If some of the glue drips, let it dry. It's easy to scrape off of the mirror with a razor blade.All done. Much better! There isn't enough room to frame the outside border of the mirror due to closets on both sides and the heat/air conditioning vent below so this was the best way to add some detail.
But...not quite girly enough for my princess. The solution? The easiest way to decorate a mirror - vinyl! This pretty vinyl art from Design Divas is perfect. It comes in so many colors. There are lots of other designs to choose from too!
Just peel of the paper backing.
Using a level, we placed the vinyl decal where we wanted it.
Rub with a credit card.
Peel the wax paper back
and...tada! Now it's perfect!
~*~

http://diyclubinc.com/


