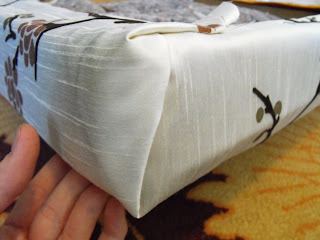
Sarah at A Little of This - A Little of That claims this is her first furniture makeover. I don't believe it! She makes it look so easy and it's beautiful! The fabric is gorgeous and I love the new black frame! I've been scouring the thrift shops, estate sales and Craigs List for an easy first project with no luck but this is certainly inspiring!
Here is her post:
Here is her post:
Retro Rocking Chair Re-Do
I am so happy to share my recent furniture re-do with all you guys! I have had so much fun breathing some new life into this VERY retro rocking chair!
Here she is in all her glory!!
Where did I find this lovely?? Canton, TX of course. The best outdoor flea market ever.Here she is in all her glory!!


How much did I pay? $40. Not back considering the potential this chair had! (potential I saw, and the hubby did not. He was like...."ewww". But, he DID let me buy it!)

I LOVE THE LEGS on this chair. It's what first caught my eye!

DO NOT be scared to re-upholster something! It's a "figure it out as you go" kind of thing. Every piece of furniture is different. Just take it apart, and go for it!
First, I removed the seat cushion. It was simply screwed in on the bottom. Remove the screws, and then pull out the cushion.
 I had to have my hubby remove the seat back. Quite a bit of pulling and yanking was required.

I then lightly sanded the whole chair, with circular sander thingy (I know nothing about tools obviously....)

Sprayed it with some primer.
 (sanding and priming are optional, but make it look so much more finished!)
I then gave the chair a few coats of Krylon Black Satin (forgot to take a pic. sorry!)

Next I re-upholstered the seat cushion.
Here are the EASY steps to do this.
- Lay fabric on the floor, wrong side of fabric up.
- Go to opposite side of cushion and pull the fabric TIGHT and staple that side (ex: if you staple the left side of the cushion first, do the right side next)
- Finish stapling remaining 2 sides, making sure fabric is tight the whole time
- When you get to the corners, make sure you neatly fold the fabric

I then tackled the padded seat back. There is really no right or wrong way to do it I discovered.
Here's what I did:
- I re-covered the existing seat back using the same steps as above
- I made my own cording to go around the edge of the seat back using cord
(can buy at any craft store) and leftover fabric from this project.
- I stapled in the cording all around the seat back opening
- I then stapled the backing right below the cording (this chair has an open back, so you can see the fabric)
- Next, I stapled the seat back cushion in place.
- I rolled the lining up over the seat back and hot glued it down to hide all the staples (all 4 sides)
Here is the finished product!

Isn't it BEAUTIFUL?


(I made the little throw pillow too)

Close up of the fabric (that matches my master bedroom bedding PERFECTLY!!)

I'm in love....................

Just another BEFORE

 GREAT job, Sarah!!! It's gorgeous! And it gives me hope! Thank you so much for sharing!!!
Sarah is a talented DIY'er! Head over to her blog,
to see more DIY projects. Here's a sneak peek of her most recent too. Wow!
Before:
After:


