Showing posts with label Closet. Show all posts

Tuesday, March 22, 2011

The Mustard Ceiling

The Mustard Ceiling

I'm sitting here multi-tasking: surfing the web, looking at entries for today's blog post, searching inspiration (I could look at beautiful homes all day long), taking a break for dinner, trying to figure out how the Nook works that I got for my birthday and watching "Speed" out of the corner of my eye. Anyway, my point is...I came across Elizabeth's home tour, before and after transformations and DIY projects and knew right away that I wanted to introduce her to you.  I love that feeling - motivation that I get from the blogging community, don't you? Elizabeth will inspire you.

Her blog is dedicated to her obsession with interior design, do-it-yourself projects and other daily musings.  :)

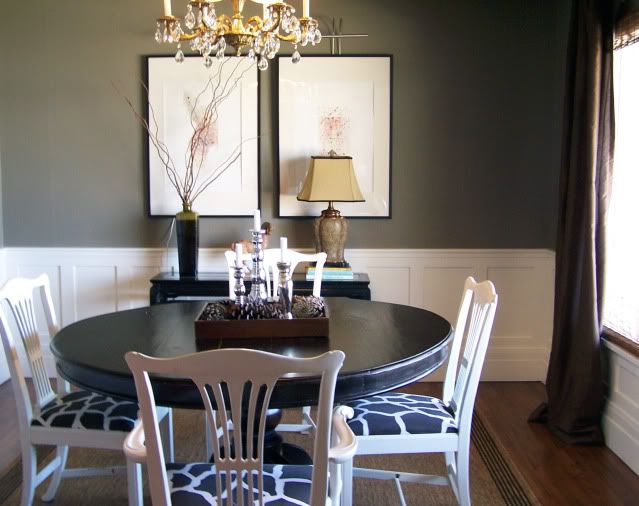
Here are a few before and afters of her gorgeous home. 

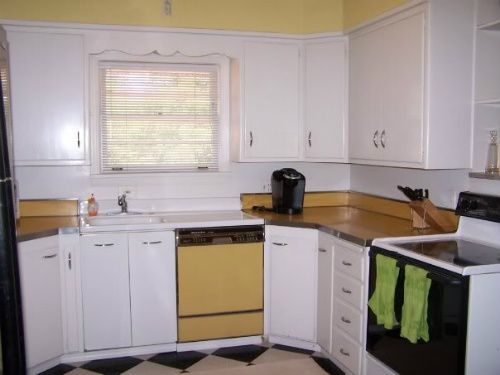
Kitchen before had charm but an outdated feel with what she calls 'groovy gold' countertops and matching dishswasher...
Photobucket
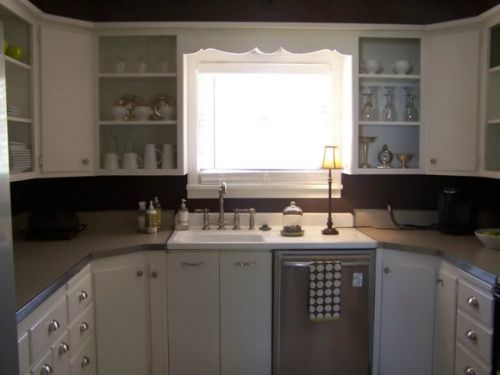
Kitchen after is so pretty with even more charm. I'm glad she kept the sink - love that! The open shelving is so convenient and a great way to bring more interest to a wall of cabinets.
Photobucket

Bedroom after...chocolate! I spy with my little eye something beginning with a L-O-V-E (remember that car game?!). A couple of things I want: that bedding, the chairs, that rug and chandelier!
Photobucket

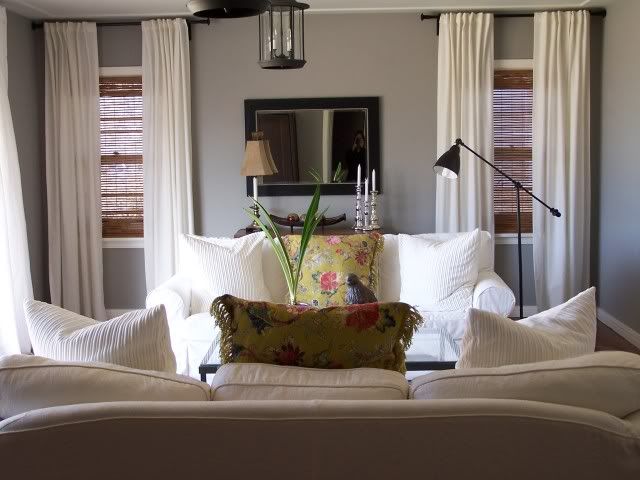
I want to curl up on the couch with a throw blanket and good book and never leave this living room:
Photobucket

See more of Elizabeth's before/after home tour at the The Mustard Ceiling Before/After.


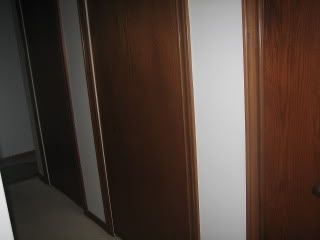
Elizabeth's husband also contributes to The Mustard Ceiling blog.  I love this post about the "Cloffice"(closet office)and living with an interior designer...
Photobucket
And great tutorial on wainscoting (their gorgeous dining room):
Photobucket

Learn how to DIY these chevron magazine files at "Dressin' it Up". So cool!
Photobucket

See more of Elizabeth's DIY projects as listed below:

Tutorials


It makes me want to get up off the couch and tackle every project all at once, not knowing where to begin!  Thank you so much for sharing your before and afters and DIY, Elizabeth (and Alfred).  Beautiful job on every single detail!   


Thursday, March 3, 2011

Many (DIY) Moments of Me


Before I feature Tatum's beautiful DIY projects, I have to give her a big CONGRATULATIONS!  You'll have to go over and visit to see her exciting news!!!  Lucky girl!


Now on to showing off!  Guests were having  hard time finding behind which door lies the room they're needing (sometimes quick). 

Before


Here his her pretty solution.  I love these signs and no more guessing games.


After

Her closet was a blank slate and offered little creativity with storage...

Before

Now it's so pretty + so FUNctional! Love the stenciled wall, hooks and labeled baskets. 

What you do think?  I LOVE both ideas!

Thank you so much, Tatum, for sharing your creativity!  And I'm looking forward to MORE of the details of your big day! ;)

Click the button!

This post is brought to you by...

storage london, for all your self storage needs

Wednesday, February 16, 2011

Closet Office - More than Rubies

With a new baby on the way and a craft room turning nursery, Amber from More than Rubies was looking for a place to organize her craft supplies and create an office space.  After a lot of research, they decided to turn the guest room closet into an office. Here are some pictures of her inspiration:


From blisstree.com


from dwellerswithoutdecorators
First, they cleaned out the closet (before):

Second step was to re-vamp an old computer desk (a GoodWill find).


They used 7ft piece of plywood to extend the desk top to fill the closet.


Sanding, priming, and painting.


After getting the painted desk and desktop into the closet, they added some side shelving for additional storage...


As a finishing touch, they added a piece of molding to the front of the desk so that the plywood addition wasn't so obvious. It worked out perfectly!


Now, they have an fun space for Amber's craft supplies and a small organized office area!  


The total cost of the closet re-model was about $100 dollars. Amber plans to find curtains to cover the opening for when it's not in use.  


Creative use of space, Amber - I love that it's so organized/out of the way!  Thank you so much for sharing your hard work!

For more of Amber's DIY projects, visit her blog at MORE THAN RUBIES.  

Thursday, January 20, 2011

Closet to Mudroom

I love when closets become new fun spaces - little rooms like my cloak room makeover and Gwenny Penny's sewing/craft space featured earlier in the week.  Take a look at Amy from The Mistress of Oxford's closet turned entryway mudroom!

Before:


They have a row of three closets on one wall. They needed a functioning space in the entryway so they retiled for the space, took the doors off and made a half wall. They relocated the light switch for a pass through and the closet turned mudroom/entryway was born. 


See all of the progress at the Mistress of Oxford Part I and Part II.


THE DETAILS
Antique leaded window = $40
(We installed 3 individual hooks)
Entryway bench = $75 KohlsWicker baskets = $20 ($10/basket) Pier OnePillow = $12 HomeGoodsRug = $15 HomeGoodsLetter "S" (pictured above) = $6 HomeGoods


Cast iron hook = $15 Elements (Local décor store)


Keyholder = $8 HomeGoods (This is on the wall next to the entryway)


Don't you love it?! When there's 3 closets in a hallway, what a great idea to make one into a functional entryway space to put on shoes, hang keys and store a purse or backpack!  Great idea and beautiful job, Amy!  Thank you so much for sharing!  It really makes a beautiful change - lightening and opening up the area.  Love the bench and decor too!

Monday, January 17, 2011

Making a Creative Space

Creating a small space for yourself might be easier than you think.  I love this idea from Gwenny Penny.  A cluttered closet becomes a useful spot for sewing and crafts.  Click the link to see the full post.

New Sewing Closet!

Closet before and after:


Isn't it awesome?  I have to admit that I did a double take.  The before looks like some of the closets in our house!
Gwen and her husband transformed it in just one weekend with some built-ins and paint.


Now it's SEW organized...


Doesn't it make you just want to dive in and organize YOUR creative space?  

Thanks so much, Gwen, for sharing your creative space.
I look forward to seeing your craft and sewing projects!


Friday, November 19, 2010

A DIY Closet Update

There's progress in the closet!


The closet now:

and here it was before – a chaotic mess:
We built about a year ago.  This space was just an awkward cubby that ran beside the basement stairs.
After building out the space and adding a door (total of which was around $200), we painted the door. I always use a Purdy paintbrush - no tape, perfect straight lines where the wall meets the ceiling. The walls are a pretty, light blue color (Dutch Boy Refresh paint) called Fountain of Youth.  Two coats, no VOC with Arm & Hammer to eliminate odors - perfect since this is where our shoes will be stored.  A great option for a potentially musty, stinky, small enclosed area!
I used Cutting Edge Stencils Whispering Elms wall pattern kit to create a wallpapered look.  See the stencil wall pattern tutorial here that I shared a few weeks ago. 
We installed custom shelving
I grabbed these coat hooks from a church garage sale – 50 cents a piece!
The coat hooks were painted with Krylon‘s Indoor/Outdoor in Satin White.
Sand to give a distressed look using a Dremel Multi-Max tool:
and give it a coat of Deft Clear Wood finish (Rockler) to protect them.
Hang the coat racks using toggle bolts to support the weight of several heavy winter coats.
All ready for hosting holiday get-togethers with a pretty place for guests’ coats and extra storage.